How to Layer a Fishing Shirt
Build a fishing shirt layering system that moves freely, handles changing conditions, and keeps collars, hoods, cuffs, and pockets easy to use.
Quick Answer
A fishing shirt can sit against your skin, over a thin base layer, or beneath insulation and a weather shell. Choose its position by how the whole outfit moves and manages changing conditions. Start with the fewest layers you need, then test reaching, turning your head, and opening zippers. A hooded shirt needs extra attention around jacket collars; a pocketed button-front needs enough outer-layer room to avoid bunching.
As an Amazon Associate I earn from qualifying purchases. These links take you to Amazon, where purchases take place.
Three relevant shirts to compare
Examples for this guide. Check the exact garment and variation on Amazon.

In this field note
Your shirt may feel excellent in the changing room and awkward as soon as you put on a jacket. The collar stands under your chin, the sleeves twist inside the shell, or your chest pockets become lumps beneath the zipper. Layering succeeds when each garment has a clear job and neighboring pieces leave it enough space to do that job. Buying several technical garments does not automatically produce a comfortable system. Begin with the outfit you already own and identify the actual interference before replacing anything.
Give every layer a job
Think of three functions: a layer against the skin, optional warmth, and an outer barrier appropriate to the conditions. Your fishing shirt may perform the first function alone. A roomy woven shirt may instead go over a thin base layer, especially when you want to remove it later without undressing completely. Insulation sits outside that combination when needed, and a shell goes outside the insulation. This is a starting arrangement, not a requirement to wear four garments. Extra fabric that contributes neither needed coverage nor warmth creates more seams, cuffs, and bulk to manage.
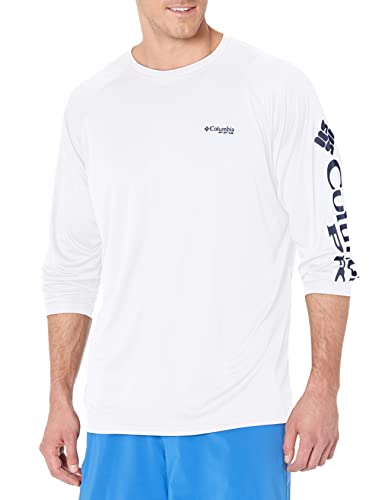
A thin long-sleeve crew is a useful place to begin when you already have a favorite jacket. Its simple neckline avoids a second collar or hood at the neck. The Columbia Terminal Tackle long-sleeve listing provides one example of that format; the title establishes the long-sleeve fishing-shirt identity, while the exact fabric and care instructions still deserve inspection. Put your existing outer layer over it before deciding that a more elaborate shirt would improve the arrangement. Simplicity is valuable when you repeatedly add and remove a jacket.
When to put something underneath
Add an undershirt because you need its function, not because fishing shirts supposedly require one. A thin base can provide a comfortable interface beneath a woven garment or preserve a clean layer when the outer shirt comes off. It can also make a warm afternoon feel unnecessarily crowded. Check the combined neckline and sleeve length while seated and leaning forward. An undershirt that creeps above the collar or rolls at the waist will require attention throughout the day, even if each garment fits well when worn separately.
Try the underlayer with the shirt buttoned before testing it open. A woven front that lies flat over bare skin may pull across the chest over another garment. Reaching forward reveals whether fabric is being borrowed from the back or shoulders. If you plan to remove the underlayer as temperatures change, consider where that change can realistically happen. A fishing shirt that can be unbuttoned is convenient, but removing a base layer still means taking other clothing off. Often the easier adjustment is adding warmth outside a comfortable shirt.
Build outward without compressing the middle
An insulating layer should fit over the shirt without stretching it tight or trapping large folds at the elbows. Put both on, straighten the inner sleeves, and reach forward as if holding a rod at chest level. Then bring your hands together across your body. Pulling at the shoulder blades suggests insufficient room somewhere in the combination. A shirt with generous chest pockets may need more space than a plain knit of the same labeled size. Assess the combination rather than assuming that every medium will nest smoothly inside another medium.
Vests leave the sleeves free and can simplify an outfit, but their arm openings still cross the shirt at a moving joint. Check for folds underneath those openings, especially with a relaxed woven shirt. A fleece or other sleeved midlayer adds another set of elbow bends and cuffs. Neither arrangement is universally preferable: use the one that gives the warmth and arm freedom you need. When examining photographs online, look beyond the torso. Armhole shape, collar height, and cuff construction often reveal more about layering compatibility than the front graphic does.
A shell must close over the real outfit
Test your shell zipped over everything you expect to wear underneath. A jacket that technically closes can still restrict a cast or pull up when you sit. Bend at the elbows, reach overhead, and turn your head in both directions. Check whether the outer hem drags the shirt upward and whether the collar presses shirt buttons or drawcord hardware into your neck. Leave pockets as you would actually use them. An empty fitting gives a different answer from a shirt carrying glasses, a folded cloth, or a small tackle item.
Do not assign a sun shirt the job of a rain shell. Water-repellent wording, when present on an exact product, is not the same as a waterproof garment. Conversely, covering a vented shirt with a shell changes how exposed those vents are to moving air. That does not make the shirt defective; it means the outer layer now governs much of the outfit's exposure. Plan accessible jacket adjustments instead of expecting hidden back vents to provide the same experience they might provide with the shirt worn alone.
Resolve collars, hoods, and cuffs before departure
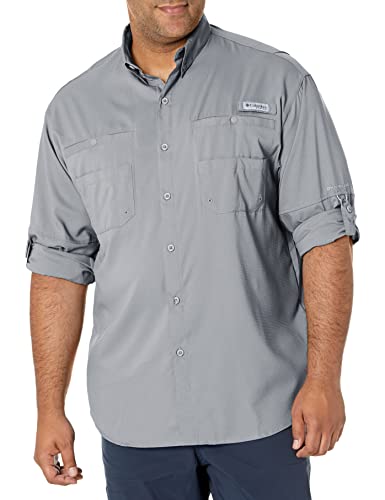
A collared button-front and a high-neck jacket can work together when the collar has somewhere to lie. Try it flat inside the jacket and in the intended wearing position without forcing a sharp fold. Columbia's current Tamiami II long-sleeve description lists a secured collar and roll-up sleeve tabs. Those details help explain what to inspect on this design, although the selected marketplace title identifies a discontinued example. Check the Tamiami II Amazon listing against the edition and label you will actually receive before relying on its details.
Two hoods require a deliberate arrangement. Put up the shirt hood, then the shell hood, and rotate your head. The inner hood should not pull the neckline backward or obstruct your sight when the outer hood tightens. Now lower both and inspect the stack behind your neck. A bulky roll can become irritating while seated. If a sun hood stays down most of the time beneath your jacket, a crew shirt may be more convenient. If you expect to remove the shell and use the shirt hood frequently, accommodating both may be worthwhile.
Cuffs are another small detail with an outsized effect. Pulling an outer sleeve over a loose shirt cuff can fold the cuff inward, while a tightly adjusted outer cuff can pin fabric against your wrist. Fasten a woven cuff in the position you intend to use, then draw the outer sleeve over it. If the shirt has thumbholes, test the hand positions with and without them engaged. Thumbholes should not become a way to drag an undersized sleeve into place. Release them before removing layers if they catch or create tension.
Make a change plan that works beside the water
Imagine the first transition: you have walked in wearing a warm layer and now want to remove it. Where does the rod go, where does the layer go, and can you take it off without emptying every pocket? A simple sequence is valuable: secure what you are holding, open the outer layer, remove only what is no longer useful, and place it where it stays available and dry. Pack frequently adjusted clothing near the top of your bag. A technically suitable jacket buried beneath tackle is less likely to be used promptly.
The second transition matters too. A dry spare shirt can be useful if the one against your skin becomes unpleasantly damp or dirty, but it needs a place protected from that same exposure. Keep worn and clean garments separate during the trip. Columbia's fishing cleanup guidance includes keeping spare items in a dry bag. Treat that as packing advice rather than a promise about any particular bag. After changing, allow the used garment an appropriate drying opportunity instead of leaving it compressed with clean clothing indefinitely.
Coverage follows the garment you actually wear
Removing a layer changes coverage as well as warmth. If the outside shirt has long sleeves and the underlayer has short sleeves, taking the shirt off exposes your arms. Rolling sleeves has the same consequence for covered area. The Skin Cancer Foundation's clothing guidance explains why coverage, fit, and the fabric rating all matter. Do not add two advertised UPF numbers together to create a new outfit rating. Choose a practical coverage plan for the layer that remains on when other pieces come off.
Compare a hooded layer with the crew you already use
Within the Free Fly shirt collection, the Elevate Hoodie provides a different neckline arrangement from the Blitz and Shade long-sleeve entries. Compare that difference with the collar of your outer layer before making fiber assumptions. These captured titles do not establish the full composition of each garment, so use their exact listings for material details. For layering, the immediate question is whether you want another hood occupying the space around your neck.
Compare the combinations, not a pile of individual features
Lay out two complete options on a chair. One might be a long-sleeve crew, your existing insulating layer, and a shell. Another might be a thin base, a woven shirt, and the same shell. Put each full combination on and perform the same movements. Note one specific problem at a time: a crowded neck, trapped pocket, raised hem, or binding elbow. Changing the garment responsible is more useful than replacing the whole outfit. Keep the successful combinations in a short packing note so you do not repeat the fitting exercise before every outing.
For a hooded alternative, inspect the HUK Pursuit Vented Hoodie and use the exact Amazon product page to check its neckline and hood photographs. The listing title identifies a vented long-sleeve hoodie; it does not supply a numerical UPF rating for this selected item. Compare its construction with the simpler options in the long-sleeve collection. For the rest of your trip planning, the on-the-water guides connect this general layering approach to specific ways of fishing, while the shirt sizing guide addresses the underlying fit checks.
Frequently asked questions
Should a fishing shirt go over a thermal base layer?
It can if the shirt has enough room and the combination meets your conditions. Test the chest, shoulders, elbows, and hem together. Adding insulation outside the shirt may be easier to adjust during the outing.
Can I wear a sun hoodie under a hooded rain jacket?
Yes, if both hoods fit comfortably together and allow you to turn your head. Check them raised and lowered; a bulky stack behind the neck may make a crew shirt more convenient.
Do two UPF shirts double the UPF rating?
Do not add garment ratings together. The published rating belongs to its specified fabric or garment, and coverage depends on how the layers are worn. Plan around the coverage of the shirt you will keep on.
Final Verdict
The strongest layering choice is the combination that adjusts easily and lets you move without managing trapped cuffs or crowded collars. Start with a comfortable shirt, add only the warmth and outer protection your outing calls for, and test the whole outfit while reaching and sitting. A crew keeps the neckline straightforward; a button-front provides an opening and pockets; a hood needs space inside any outer hood. Keep removable layers accessible and a spare shirt separated from wet clothing. Once a combination works, record it so future packing starts with a proven fit rather than another collection of guesses.
Explore the matching collections
Take the next step
Compare your shortlist or explore more on the water.
Revisit the first shirt on Amazon ↗Related field notes
What to Wear Under Waders for Fly Fishing
Choose comfortable layers under fishing waders with checks for bulk, sweat, shirt hems, socks, seams, and changing conditions from the walk to the water.
Read the field note →Columbia Bahama II vs Tamiami II: Which Button-Front Fits Your Routine?
Compare Columbia Bahama II and Tamiami II fishing shirts by current fabric details, fit, storage and sleeve choice while keeping marketplace versions distinct.
Read the field note →How Should a Fishing Shirt Fit? Measure and Check Movement
Find a fishing shirt fit that works through the chest, shoulders, sleeves and hem, with a clear method for reading size charts and checking movement.
Read the field note →Caring for Fishing Shirts After Saltwater Trips
Build a practical post-trip routine for saltwater fishing shirts, from fresh-water rinsing and stain checks to careful drying, packing, and storage.
Read the field note →