How to Remove Fish Blood Stains from Fishing Shirts
Remove fish blood from fishing shirts with cold-water first steps, fabric-safe pretreatment, and a check-before-drying routine for fresh or dried stains.
Quick Answer
Flush fresh fish blood with clean cold water, then pretreat and wash according to the shirt and cleaner labels. Keep the shirt out of hot water and the dryer until you have checked the stain. Dried blood needs a patient repeat of compatible treatment, not harder scrubbing. Check graphics, fabric restrictions, and colorfastness before using a stain remover; a stain-resistant claim does not make a shirt stainproof.
As an Amazon Associate I earn from qualifying purchases. These links take you to Amazon, where purchases take place.
Three relevant shirts to compare
Examples for this guide. Check the exact garment and variation on Amazon.


Men's Aquatek Gunner Hoodie
Long sleeve · Listed UPF 50+
Details & considerationsView on Amazon ↗In this field note
Fish blood on a shirt is easiest to manage when the first decision is simple: cool fresh water now, heat later only after the stain is gone. The challenge is that the spill rarely happens beside a laundry sink. It happens while you are handling a fish, clearing equipment, or heading back to the dock. Separate the immediate containment step from the proper treatment you can do at home.
At the boat: contain the mess without grinding it in
- Finish handling the fish and equipment before turning attention to your shirt.
- Lift away loose material without scraping it across clean fabric.
- Use clean cold fresh water to rinse the affected area when practical.
- Blot remaining moisture with a clean cloth instead of rubbing the stain.
- Change into a spare shirt if available, and keep the marked garment apart from clean clothing.
Do not use the shirt itself as a fish-handling towel. That spreads one localized mark across several panels and works residue into cuffs and seams. Avoid wiping the stain with a bait rag or a deck-cleaning cloth: either can introduce a second substance that needs a different treatment. A modest rinse with clean water is more useful than a vigorous scrub with whatever happens to be within reach.
Columbia's fishing cleanup advice recommends cold-water cleaning and spot treatment without rubbing, and cautions against high drying heat that can set stains and odors. Use that as an initial direction, subject to your garment's instructions. It is not permission to use every cleaner in a boat locker on clothing. Keep detergents and treatment runoff away from the water by doing full laundering at a suitable facility.
Before pretreating, identify what you are treating
Turn the shirt inside out and read the care label. Note whether it is washable, whether bleach is prohibited, and whether a print or other decoration has separate restrictions. Then inspect the mark on both sides. A small spot on plain fabric presents a different task from a large patch crossing a logo, a mesh vent, and a pocket seam. Work with the most restrictive part involved.
Take a quick photo if the stain is hard to locate when wet. Pale stains can seem to vanish during rinsing and become visible again as fabric dries. A photo also helps you track whether repeated treatment is helping. This is especially useful for a patterned shirt, where the stain can hide within a dark section until the shirt is worn in daylight.
Use a concealed section to check a stain-removal product as its instructions direct. Watch for dye transfer, a color change, or a change in surface finish. A successful hidden test reduces uncertainty but does not justify extending the treatment time beyond the product's directions. If the shirt is valuable or has delicate decoration, asking the maker or a professional cleaner before treatment may be the better choice.
Why a white shirt is not automatic bleach permission
Color and care permission are different facts. Columbia's current Tamiami II long-sleeve page prohibits bleach, while its Bonehead short-sleeve page lists bleach when needed. The label on your exact garment controls the allowed type and conditions. Neither a white appearance nor another shirt's successful cleanup tells you what this shirt can tolerate.
The Bonehead short-sleeve product overview and Tamiami II long-sleeve overview are useful examples of why a fishing wardrobe needs more than one care assumption. They are included here to compare care decisions, not to suggest that purchasing a different shirt guarantees easier blood removal.
Work through a fresh stain in a controlled sequence
At a sink, rinse with cold water. If you can position the stained panel without soaking unrelated decoration, let water move through it rather than scrubbing the surface. Keep the rest of the garment out of dirty rinse water. Once loose residue has been removed, use a compatible detergent pretreatment or stain product in the amount and for the contact time printed on its label.
Tide's blood-stain instructions call for a cold rinse, detergent pretreatment, a cold wash, and repeating treatment before machine drying when a mark remains. Its guidance specifically warns that hot water and drying can set the stain. Those core steps provide a useful sequence; any named product's dose and soaking instructions remain specific to that product.
Do not let concentrated pretreatment dry on the shirt unless the product explicitly directs it. Set a reminder if you tend to get distracted during cleanup. Avoid adding a second cleaner on top of the first. A controlled treatment lets you see what worked and prevents accidental mixing. If a later product is needed, finish and rinse the earlier treatment according to its directions first.
Wash with compatible clothing, or separately if there is substantial residue. Choose the garment's allowed cycle and a detergent amount suited to the load and machine. More detergent is not a substitute for pretreatment. After washing, examine the shirt before selecting a drying method. If the area remains marked, keep it out of a heated dryer and return to a permitted treatment.
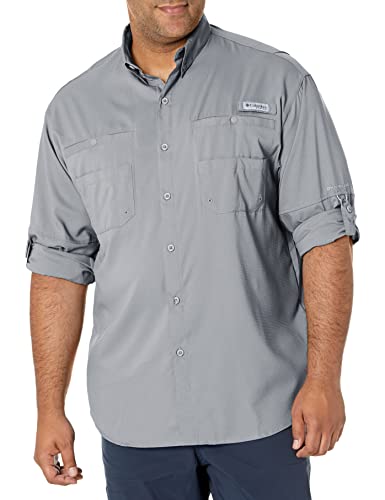
For a woven example, review the selected garment information in the Tamiami II listing on Amazon. Its marketplace title includes discontinued wording, so current-model instructions should be checked against the shirt actually received or owned. The objective is matching treatment to a garment, not extrapolating from a model name.
If the blood dried during the drive home
Begin with the same cold-water approach rather than assuming dried blood needs hot water. Allow the permitted detergent or stain treatment to do its work for its stated interval. An enzyme-containing laundry product may be worth considering where both its own directions and the garment label permit it. Columbia includes stain-lifting enzymes among its fishing-cleanup suggestions; that is an option to evaluate, not a requirement for every shirt.
Do not scratch dry residue with a knife, hook point, or stiff deck brush. Even if a crust flakes away, the fabric beneath can snag or abrade. A damaged surface may leave a visible spot after the discoloration is gone. Gentle handling matters most on fine knits, where one aggressive scrub can turn a washable stain into a permanent fuzzy patch.
After a treatment and wash, compare the result with the original photo. If the stain is fading and the fabric remains unchanged, another label-compatible attempt may be reasonable. If there is no improvement, stop escalating through household chemicals. Ask the manufacturer or a cleaner what remains suitable. A stain that has already been hot-dried may be harder to remove; no home method can promise complete restoration.
Do not confuse remaining stain with lingering odor
A shirt can look clean and still smell, or have a faint mark with no odor. These are separate outcomes. Avoid masking an odor with fragrance while continuing to treat a stain. If smell is the remaining issue, use the dedicated fish-odor removal guide. If a sunscreen mark overlaps the blood spot, identify that problem separately rather than assuming the same chemical treatment will solve both.
If a shirt has several separate blood spots, treat them as separate locations during inspection. Rinsing the largest mark can distract from smaller flecks on the opposite cuff or shoulder. Mark their positions in your photo rather than pinning or drawing on the garment. After washing, compare every location before deciding that the whole shirt is ready for its normal drying routine.
Inspect the places a quick glance misses
Spread the shirt in good light. Check cuffs, the underside of a collar, pocket corners, and seams where the stained panel folds over itself. Turn it inside out to look for a shadow that may not show from the front. On a dark garment, examine the surface at an angle for dried residue rather than looking only for a red or brown mark.
If you are uncertain while it is wet, let the garment dry by a permitted unheated method and inspect again. Do not use an iron to make the area easier to see. Once you are satisfied, follow the normal allowed drying and storage instructions. Put the shirt away fully dry; a clean-looking damp shirt sealed in a travel bag creates another avoidable cleanup task.
Make the next stain less disruptive
Carry a clean cloth and a spare shirt in a dry compartment, and decide where wet clothing will go before leaving the dock. Empty that wet-clothing bag as soon as practical after the trip. Choose storage that prevents cross-contamination during travel, then take the garment out for treatment instead of leaving it sealed overnight. These habits matter more than keeping a shelf of aggressive cleaners.
Some shirts advertise stain repellency. The Pelagic Aquatek Gunner hoodie listing on Amazon includes a water- and stain-repellent claim, but that wording is not a promise that fish blood cannot mark the fabric. Treat spills promptly and consult the exact label. You can browse long-sleeve fishing shirts for coverage and garment form without treating stain-related marketing as a cleanup guarantee.
For the rest of the wash routine, return to the care guides. Blood removal is a focused problem: keep the first rinse cold, choose a compatible pretreatment, inspect before heat, and stop before treatment damages the shirt. A faint residual mark may be an acceptable outcome on working fishing clothing when the alternative is a bleached patch or weakened panel.
Frequently asked questions
Can I use hot water once fish blood has dried?
Start with cold water even for dried blood. Follow the shirt and treatment labels, and avoid using heat to force the process.
What if the shirt already went through the dryer?
Try a compatible treatment again, but expect a more difficult stain. Inspect the fabric and stop if the treatment changes its color or surface.
Does stain-repellent fabric mean blood rinses straight off?
No. Repellency is not stainproofing. Prompt rinsing and label-compatible cleaning still matter, especially at seams and worn areas.
Final Verdict
The most useful blood-stain routine is controlled and repeatable: rinse cold, check the shirt label, pretreat with a compatible product, wash, and inspect before applying heat. Give dried stains another careful attempt rather than scrubbing harder or combining cleaners. Keep special attention on prints, vents, and seams, because those details can limit treatment even when the main fabric appears robust. A spare shirt and a clean rinse cloth make the first response easier on the boat. If safe treatment stops producing improvement, seek garment-specific advice or accept the remaining mark instead of damaging otherwise usable clothing.
Explore the matching collections
Take the next step
Compare your shortlist or explore more care & durability.
Revisit the first shirt on Amazon ↗Related field notes
Should You Use Fabric Softener on Fishing Shirts?
Learn when to skip fabric softener on fishing shirts, how to interpret care instructions, and what to check after an accidental softener wash at home.
Read the field note →What Are Fishing Shirts Made Of?
Learn how fishing shirt fibers, knit or woven construction, stretch, and finishes work together—and which details to verify on the garment label.
Read the field note →How to Get Wrinkles Out of Fishing Shirts
Get wrinkles out of fishing shirts with label-safe drying, careful pressing, and travel packing tips for woven shirts, performance knits, and logos.
Read the field note →Columbia Tamiami II vs Bonehead: Polyester Utility or Cotton?
Compare Columbia Tamiami II long sleeve and Bonehead short sleeve by verified fabric, fit, pockets, care, and the sleeve difference that shapes the choice.
Read the field note →