How to Get Fish Smell Out of Fishing Clothes
Remove fish smell from fishing clothes with a targeted routine for residue, pockets, washing, repeat odors, and clean storage after the trip.
Quick Answer
To remove fish smell, deal with visible residue, check pockets and folded areas, and wash with a label-compatible detergent and pretreatment. Columbia’s general fishing-cleanup advice starts with clean cold water and avoids high drying heat. Check the result before drying and again once the shirt is fully dry. If odor returns, inspect the garment and laundry process instead of covering it with fragrance or combining unverified home remedies.
As an Amazon Associate I earn from qualifying purchases. These links take you to Amazon, where purchases take place.
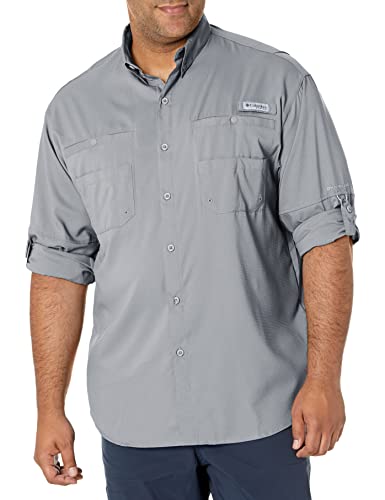
Three relevant shirts to compare
Examples for this guide. Check the exact garment and variation on Amazon.


In this field note
- First, locate the source instead of treating everything
- Make a small record before repeating the wash
- Use a label-compatible cleanup sequence
- Examples that need different care checks
- If the smell survives one careful wash
- If it smells acceptable wet but returns after drying
- Drying and storage close the loop
A fishing shirt can smell clean at the end of a wash and disappoint you as soon as you pull it from the bag for another trip. When that happens, the useful question is where the problem survived or returned. A stronger fragrance does not answer it. A methodical check of the shirt, the wash, and storage gives you a clearer path to a wearable garment.
First, locate the source instead of treating everything
Spread the shirt on a surface where you can inspect it. Turn pockets out if the construction allows, unfold cuffs, and look behind the collar. Check the hem that may have touched a fish, bait container, or cleaning surface. Remove loose material carefully before placing the garment in the washer. An overlooked pocket can keep contributing contamination through repeated washes.
Separate an odor problem from a visible stain problem. If blood is present, the fish-blood stain guide is the more specific starting point. If a collar has sunscreen residue, use the sunscreen guide. Several marks can occur on the same shirt, but applying one aggressive treatment to all of them is rarely the clearest plan.
Also consider what the shirt touched after fishing. A damp towel, fish-handling glove, or unclean gear bag can transfer the problem back to a washed garment. Put the shirt aside from those items while you work. The care guides cover the related cleanup tasks without requiring you to treat every piece of gear as if it were the same fabric.
Make a small record before repeating the wash
If this is a recurring issue, note where the smell is strongest, whether visible residue remains, and what happened during the previous wash and dry. You do not need precise odor scores. A few observations can distinguish a collar problem from a pocket problem or a shirt that was packed before fully drying.
Record the care instructions too. Check the actual tag for washing temperature, bleach restrictions, and drying method. If the shirt has a printed design or a named finish, those features may have specific limits. Follow the exact garment's instructions rather than a blanket rule for polyester, cotton, or fishing clothing.
Do not interpret an odor-control marketing claim as a promise that fish residue cannot smell. A treatment claim and ordinary cleaning are different matters. If a garment's care instructions refer to a treatment, preserve them; do not assume that stronger chemistry will leave every claimed feature unchanged.
Use a label-compatible cleanup sequence
Remove residue and prepare the affected areas
Lift away visible material without grinding it deeper into the fabric. For fresh marks, blot with a clean material rather than vigorously rubbing. Columbia's fishing cleanup guidance recommends clean cold-water soaking and cold washing, with stain-lifting enzymes when appropriate. Check your garment and treatment labels before using that approach.
A soak is a defined treatment step, not indefinite storage in dirty water. Use a clean basin, follow any product directions, and move on to washing as required. If the shirt prohibits soaking or a particular additive, honor that restriction. The point is to remove the contamination while keeping the garment within its permitted care routine.
Choose a product for the fabric and problem
Use a laundry detergent and, if necessary, a pretreatment that explicitly suits the garment. Follow the product's amount, contact time, and rinsing instructions. If testing on an inconspicuous area is required, do that before treating a prominent printed panel. Do not assume that the absence of an immediate visible change proves compatibility with every finish.
Avoid building a recipe from several unrelated tips. Vinegar, baking soda, dish products, bleach, and laundry treatments are not interchangeable tools, and adding more of them makes the process harder to evaluate. Use a single documented, compatible approach at a time. Never mix cleaning chemicals; follow each product's safety and use directions.
Wash with a compatible load
Check that the other items can use the same settings and are not heavily contaminated in ways that need separate handling. Measure detergent according to its directions and the appliance requirements. A strong smell is not a reason to pour an arbitrary extra amount into the machine. If pretreatment is appropriate, address the affected area before the main wash.
Remove the shirt promptly after the cycle and inspect it. Look into pocket corners and collar folds again. If the odor or visible residue remains, pause before using the dryer. Repeating a compatible treatment may be reasonable, but first ask whether you missed a localized source or used a process that did not suit the garment.
Examples that need different care checks
The Columbia Bonehead Short Sleeve is a collared, pocketed example. Its current manufacturer's model page identifies cotton and several chest pockets. Those pockets are practical inspection locations, not evidence that the shirt is inherently harder to deodorize. Match the actual label before selecting treatment.
The Baitium Bluefin hoodie title identifies recycled polyester and UPF50. For this design, inspect folds around the hood and neckline as well as the torso. Neither the fiber claim nor the UPF number tells you which odor-removal additive is allowed. The delivered care label remains the relevant instruction.
For the pocketed example, review the Bonehead Short Sleeve listing on Amazon. It is included here to illustrate where contamination may be overlooked, not as a claim that buying another shirt removes odor more effectively. Before replacing a garment, establish whether ordinary compatible care can resolve the problem.
If the garment has a detachable accessory, consider whether that piece has been overlooked. A separate neck covering or other item worn alongside the shirt may retain odor even after the shirt is clean. Check its own care instructions and keep its treatment distinct. Testing the shirt away from the rest of the outfit can help locate the source more clearly. There is little value in repeatedly washing a sound garment when the odor is coming from something stored next to it.
If the smell survives one careful wash
Return to the exact spot rather than immediately changing the entire process. Is a pocket still holding material? Did the treatment reach both sides of a folded cuff? Is the odor actually coming from the towel or bag used after washing? Answering those questions can save another unnecessary full-load cycle.
Check the detergent and treatment directions for a permitted repeat application. If the first attempt produced discoloration, texture change, or print damage, stop and seek garment-specific advice. Repeating a method that visibly harms the shirt is not progress. Preserve the care label and product names so the manufacturer or a professional cleaner can understand what has already been tried.
For a persistent problem with no visible damage, change only a justified part of the process. For example, correct a missed pocket inspection or follow an appropriate pretreatment step that was omitted. Avoid changing detergent, temperature, soak time, and drying method together without a reason. Otherwise, even a successful result will be difficult to reproduce.
If it smells acceptable wet but returns after drying
Evaluate the shirt when fully dry before deciding the problem is solved. Fragrance and damp fabric can make it difficult to judge the result during the wash stage. A dry inspection is a practical check, not a chemical diagnosis. If the smell returns, note whether it is in the same place as before or spread across the garment.
Inspect the drying arrangement. Were the hood and sleeves folded against the torso? Was the garment crowded among other wet items? Did it go into a bag before the pockets were dry? Correcting those handling issues is worthwhile even when additional washing is needed. Clean clothing needs a route to complete drying and clean storage.
Also check the washer's maintenance instructions if several unrelated loads have a similar problem. Do not pour an improvised cleaning mixture into the appliance. Use the machine manufacturer's procedure and keep that task separate from the shirt treatment. A garment cannot be evaluated fairly if the laundry environment itself needs attention.
Drying and storage close the loop
Follow the shirt's drying label and avoid high heat as a shortcut for unresolved odor. Columbia's fishing-clean guide cautions against high drying heat that can set stains and scents. Our drying guide helps choose among permitted methods without assuming every fishing garment is dryer-safe.
Once dry, place the shirt in a clean location away from wet fishing equipment. Clean the storage bag according to its own instructions if it carried contaminated clothing. Keep a simple separation between ready-to-wear clothes and items awaiting cleanup. This is easier to maintain when the bag has an obvious place to empty as soon as you get home.
The Baitium Bluefin hoodie listing on Amazon provides a second garment format for comparing care needs. Browse hooded fishing shirts only if you are also reconsidering design; an odor problem alone does not establish that a different category will solve it. Good care begins with the shirt you have and the contamination you can identify.
For the next outing, plan where the worn shirt will go and when it will be unpacked. A spare dry top can make that transition easier. Keep the soiled garment separate during transport, then start its label-compatible cleanup promptly. A repeatable arrival-home routine is more useful than a last-minute attempt to mask a smell just before leaving again.
Frequently asked questions
Why does fish smell return after the shirt dries?
The odor may not have been fully removed, or the shirt may have contacted unclean storage items or been packed damp. Inspect the affected locations and laundry process before repeating treatment.
Can I use vinegar and baking soda together for fish smell?
This guide does not recommend an improvised mixture. Choose a label-compatible laundry treatment and follow its directions. Do not mix cleaning chemicals or assume household ingredients suit every finish.
Does an odor-control shirt still need washing after fishing?
Yes, a marketing claim does not remove visible contamination or replace ordinary care. Follow the garment label and inspect pockets, cuffs, and other areas that contacted fish or bait.
Final Verdict
Fish smell is easier to tackle when you locate the source and keep the process controlled. Empty pockets, remove residue, use a compatible wash and pretreatment, and judge the result before drying and again when fully dry. If odor returns, inspect storage, folded areas, and the laundry process instead of covering it with perfume. Garment examples in this guide illustrate different places to check; they do not establish a deodorizing winner. A clean, fully dry shirt stored away from contaminated equipment is the practical goal, reached through instructions that fit the actual fabric and finish.
Explore the matching collections
Take the next step
Compare your shortlist or explore more care & durability.
Revisit the first shirt on Amazon ↗Related field notes
Dark vs Light Fishing Shirts: Color and Comfort
Compare dark and light fishing shirt colors for practical comfort, visible stains, outfits, and documented UPF without guessing what fish see.
Read the field note →How to Wash Fishing Shirts and UPF Clothing
Wash fishing shirts and UPF clothing with a label-first routine for stains, fasteners, detergent, rinsing, and drying across different fabrics.
Read the field note →Do Fishing Shirts Shrink?
Do fishing shirts shrink? Learn how to check a fit change, compare garment measurements, read care limits, and avoid using heat to resize shirts.
Read the field note →Can You Put Fishing Shirts in the Dryer?
Can fishing shirts go in the dryer? Follow a practical drying decision guide for care labels, damp hoods, prints, travel, and unfinished stains.
Read the field note →