How to Wash Fishing Shirts and UPF Clothing
Wash fishing shirts and UPF clothing with a label-first routine for stains, fasteners, detergent, rinsing, and drying across different fabrics.
Quick Answer
Wash a fishing shirt according to its own care label, because cotton button-fronts and performance sun shirts can have different instructions. Inspect and treat marks first, empty pockets, secure snagging fasteners, and choose the permitted detergent, temperature, and cycle. Check the shirt before drying and follow its drying directions. UPF does not create one universal laundering recipe or justify ignoring restrictions on bleach, heat, or special finishes.
As an Amazon Associate I earn from qualifying purchases. These links take you to Amazon, where purchases take place.
Three relevant shirts to compare
Examples for this guide. Check the exact garment and variation on Amazon.

In this field note
- Before the shirt reaches the washer
- Read the entire care label once
- Prepare the garment, then choose the load
- Pretreat the problem you actually found
- Measure detergent and select permitted settings
- Pause between washing and drying
- UPF clothing does not need an invented wash schedule
- Set up the next wash while the label is handy
The laundry pile after fishing often contains garments that look related but need different handling. A cotton pocket shirt, a lightweight hoodie, and a printed performance top may all be called fishing shirts. That label describes their intended use, not a shared set of washing instructions. The most reliable routine begins by sorting the instructions as carefully as the colors.
Before the shirt reaches the washer
Empty every pocket over a clear surface. Look for small hooks, split shot, receipts, bait packaging, and other items that can hide in corners. Check utility loops and fold-back cuffs too. This is a practical garment and machine check: a shirt can look empty from the front while still holding something inside a chest pocket.
Inspect the collar, underarms, sleeve ends, and lower front. Decide whether you are dealing with ordinary wear, visible fish residue, blood, sunscreen, or salt exposure. Those problems can need different pretreatment choices, so identify them before applying a product to the entire shirt. The care guide hub links to focused instructions when a particular contaminant is the main issue.
If you cannot wash immediately, do not leave the shirt forgotten in a closed wet bundle. Arrange transport so wet clothing can be dealt with promptly when you return. A separate bag may protect clean items during the journey, but it is a transport solution rather than a long-term storage method. Unpack it as part of putting the fishing gear away.
Read the entire care label once
Find the fiber information and care instructions on the actual garment. Check washing, bleach, drying, ironing, and dry-cleaning directions separately. A permission in one category does not imply permission in another. If the tag uses symbols you do not recognize, confirm them through the manufacturer or an authoritative care-symbol reference before starting the load.
Take a photograph while the text is readable. It is particularly useful for households with several nearly identical shirts or for garments whose tags are trimmed for comfort. Save the image under the model name. The next time a stain or dryer question arises, you can answer from the garment's instructions rather than from a general internet rule.
If the label is missing, identify the style before choosing treatment. A current page for a related shirt may be helpful, but it should not silently replace the instructions for an older edition. Ask the manufacturer for the matching care information if the model is uncertain. A brief delay is preferable to improvising a strong chemical or high-heat cycle.
Two Columbia examples show why sorting matters
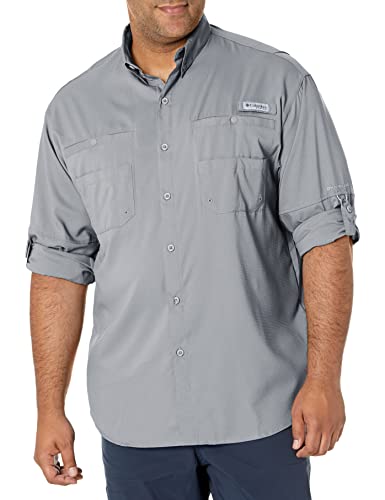
Columbia's current Tamiami II Long Sleeve page lists polyester and prohibits bleach. Its Bonehead Short Sleeve page identifies cotton and lists bleach when needed. The actual labels resolve type and settings. One brand name clearly does not produce one bleaching rule.
The Tamiami II Long Sleeve listing and Bonehead Short Sleeve listing are therefore garment examples, not a ranking of easy-care shirts. The Tamiami listing includes discontinued wording, making the delivered tag especially useful for confirming the edition. Do not transfer the current page's complete instructions without checking that match.
Prepare the garment, then choose the load
Close fasteners that could catch fabric, following any specific garment instructions. Pay attention to hook-and-loop tabs and zippers. Check that a closure is clean enough to secure properly; trapped debris can prevent it from lying as intended. Columbia's general product-care guidance recommends securing fasteners to reduce snagging.
Group the shirt with items that can use compatible settings. A care label that allows a gentle cool wash does not mean the garment belongs in a heavy load with abrasive hardware. Think about the whole load: weight, color handling, fasteners, and required temperature. If two items need conflicting treatment, separate them instead of compromising with a setting that suits neither.
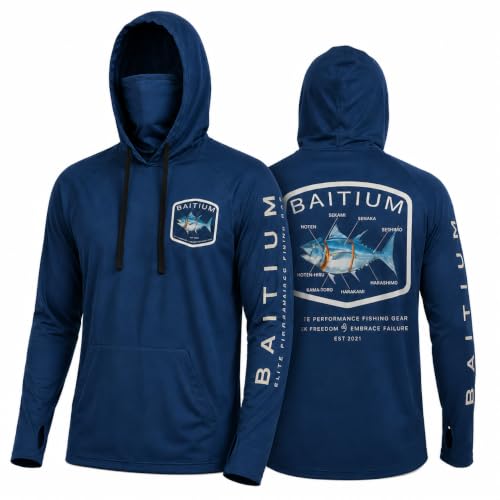
Turning a graphic shirt inside out can be a useful handling choice when consistent with its instructions, especially if you want the printed surface away from direct contact with other garments. Do not treat that step as permission to disregard a print-specific temperature limit. The most sensitive part of the garment may determine how the whole shirt is washed.
Pretreat the problem you actually found
For routine fishing cleanup, Columbia's fishing-clean guide recommends cold-water soaking and washing, with appropriate stain treatment. Individual garment restrictions still control. Use the cleaning product's directions as well, including fabric suitability, testing, and contact time. A stronger dose is not a substitute for identifying the stain.
Blot a fresh mark instead of spreading it by vigorous rubbing. If you use a pretreatment, work on the affected area and rinse or wash as its directions require. Avoid combining multiple household remedies in the hope that something will work. That approach makes compatibility harder to assess and obscures which step changed the stain.
If odor is the main problem, follow the fish-smell removal guide. If the issue is a greasy collar, use the sunscreen stain guide. Those focused routes are more useful than applying every available treatment to every fishing shirt.
To see the kind of collared garment whose label you would check, open the Tamiami II Long Sleeve listing on Amazon. Its purchase details can help identify the model; the listing is not a universal washing instruction for the other shirts in your basket.
Measure detergent and select permitted settings
Use a detergent suitable for the fabric and the washing machine, in the amount its directions call for. Consider the load size and soil instructions on the product. Do not automatically double the dose because the shirt smells strongly. Excess product creates another variable to resolve, while an appropriate pretreatment may be the more targeted step.
Choose the water temperature and cycle allowed by the garment. If several permitted options exist, select a routine appropriate to the condition of the shirt rather than the most aggressive available setting. A machine's cycle name does not by itself establish compatibility: check temperature, agitation choices, and any special label requirements you can control.
Leave room for the load to move according to the appliance instructions. When a shirt comes out with visible residue or an incomplete rinse, inspect the load and product dosing before repeating the same process. The goal is clean fabric, not simply a completed timer. If the machine itself seems to be contributing an odor, address its maintenance instructions separately.
Pause between washing and drying
Remove the shirt and look closely at treated areas before applying heat. Check seams, collar folds, pockets, and the reverse side of a stain. If a mark remains, decide whether another label-compatible treatment is appropriate. A wet inspection may not reveal every subtle mark, so use adequate light and avoid rushing the step merely because the next load is ready.
Follow the drying directions for that garment. Some shirts permit tumble drying; others call for a different approach. Our drying decision guide deals with that stage specifically. Where air drying is allowed, spread the garment so folds and overlapping layers are not left damp inside a compact bundle.
Check that pockets, cuffs, and hood layers are dry before storage. Fold or hang the shirt in a way that suits its construction and your space. A clean shirt packed damp can undo the effort you just spent on the laundry routine. The final storage check is short, but it belongs to the washing process rather than being an optional afterthought.
UPF clothing does not need an invented wash schedule
Wash based on use, soil, and the garment's instructions. There is no basis here for a fixed rule that all UPF tops must be replaced or retired after a particular number of washes. Equally, the original tag does not promise that torn, heavily worn, or incorrectly treated fabric remains equivalent to new material. Keep care and inspection together.
When a brand gives a model-specific limit or instruction, preserve it with the garment record. Do not extend a statement about treated insect-repellent clothing, waterproof outerwear, or a different fabric finish to an ordinary sun shirt. The name of the technology matters less than whether the information actually applies to the item in your hands.
When you wash by hand while away from home, keep the same decision order. Use a clean container, a compatible product, and the permitted temperature; then rinse and dry according to the garment's instructions. A hotel sink does not make a concentrated treatment gentler or remove a restriction on soaking. Pack only the laundry supplies you can use correctly, with their directions available, and allow enough time to complete drying before the shirt goes back into your luggage.
Set up the next wash while the label is handy
A simple note can prevent repeat research: compatible cycle, detergent restrictions, stain products already checked, and drying method. Keep separate notes when the household owns different designs. If someone else does the laundry, a clear garment-specific instruction is more useful than a vague request to treat all fishing clothes carefully.
The Bonehead Short Sleeve listing on Amazon illustrates why a cotton button-front deserves its own instructions. Browse button-front fishing shirts if that format suits you, but choose future purchases partly for a care routine you can maintain. Owning a shirt whose instructions fit your routine is easier than repeatedly trying to work around them.
Frequently asked questions
Can I wash every fishing shirt together?
Only when their care requirements and load compatibility align. Check temperature, bleach, drying restrictions, color handling, and fasteners. Similar fishing branding does not establish identical care.
Should UPF clothing always be hand washed?
No universal hand-wash requirement follows from UPF. Some garments permit machine washing. Follow the actual label for the specific shirt and any treatment or print.
What if my fishing shirt’s care tag is unreadable?
Identify the exact model and ask the manufacturer for matching instructions. A page for another edition can differ. Avoid guessing about bleach, high heat, or special treatments while the instructions remain unclear.
Final Verdict
A good fishing-shirt wash is a sequence of small, specific decisions: identify the garment, inspect the soil, prepare the fasteners, use compatible treatment, and check the result before drying. UPF does not replace the care label, and a shared brand does not make cotton and performance fabrics interchangeable. Photograph the instructions once so later washes are easier. If a stain remains, address that particular problem instead of escalating the entire load. Finish by drying and storing the shirt properly, ready for the next outing rather than damp in the bottom of a bag.
Explore the matching collections
Take the next step
Compare your shortlist or explore more care & durability.
Revisit the first shirt on Amazon ↗Related field notes
Do Fishing Shirts Shrink?
Do fishing shirts shrink? Learn how to check a fit change, compare garment measurements, read care limits, and avoid using heat to resize shirts.
Read the field note →How Does UPF Clothing Work?
Learn how UPF fabric limits UV transmission, why coverage and fit matter, and which fishing shirt claims need a closer look before buying one.
Read the field note →What Is the Velcro Strap on a Fishing Shirt For?
Identify a fishing shirt’s rod-holder strap, tell it apart from sleeve tabs and utility loops, and check whether its placement fits your tackle routine.
Read the field note →How to Get Fish Smell Out of Fishing Clothes
Remove fish smell from fishing clothes with a targeted routine for residue, pockets, washing, repeat odors, and clean storage after the trip.
Read the field note →