How to Get Wrinkles Out of Fishing Shirts
Get wrinkles out of fishing shirts with label-safe drying, careful pressing, and travel packing tips for woven shirts, performance knits, and logos.
Quick Answer
A fishing shirt usually needs less intervention than a dress shirt. Start by hanging it correctly and smoothing the fabric; if creases remain, choose only a drying or ironing method the garment label allows. Steam is not automatically safe for a shirt marked low iron. Work around graphics, mesh, and closures, and accept a faint crease when removing it would require more heat than the label permits.
As an Amazon Associate I earn from qualifying purchases. These links take you to Amazon, where purchases take place.
Three relevant shirts to compare
Examples for this guide. Check the exact garment and variation on Amazon.


In this field note
A crease across a fishing shirt's back can come from a suitcase, a crowded dryer, or the way a damp shirt was left over a chair. Those situations do not all need the same remedy. Before reaching for an iron, spread the shirt out and decide whether you are dealing with ordinary wrinkles, a folded seam, or fabric that has changed shape. Heat may improve the first problem and make the others worse.
Read the label as a set of separate permissions
Find the washing, drying, and ironing instructions inside the shirt. Permission to tumble dry does not necessarily mean permission to iron, and a low iron setting does not automatically permit steam. GINETEX's care-symbol guidance directs users to choose ironing temperature from the care label rather than fiber content. Its low-temperature guidance also identifies steam as a possible source of irreversible damage. The practical consequence is simple: do not guess from the word polyester or cotton alone.
Check written instructions alongside the symbols. A printed fishing graphic, bonded logo, mesh panel, or decorative transfer may need gentler handling than the main fabric. If instructions conflict or the label is unreadable, look up the exact style with the manufacturer. While waiting, use methods that require no heat. A shirt that looks slightly rumpled is preferable to one with a shiny iron-shaped patch.
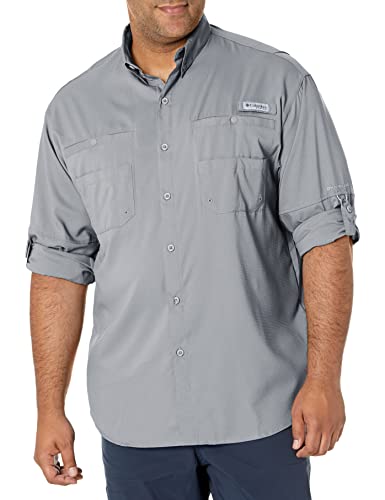
The differences within one brand are instructive. Columbia's current Tamiami II long-sleeve manufacturer page and its Bonehead short-sleeve page both list ironing among care options, but their other care permissions differ. Those pages are examples, not replacements for the label on an older shirt or marketplace variant. The listed Tamiami II long sleeve even carries discontinued wording in its title, making exact garment identification useful.
Try the no-heat reset first
Empty the pockets and release rolled sleeves. Button enough of the front to let the panels hang evenly without pulling the collar tight. Put a woven shirt on a hanger wide enough to support its shoulders. Lay a stretchy knit flat if its label directs flat drying, or use a suitable hanger if hanging is permitted. Smooth the placket, shoulder seams, and hem with open hands rather than tugging on the fabric.
If the shirt is clean and dry, give it time to relax after unpacking. Do not judge it immediately after pulling it from a compressed bag. If it is washable and a crease remains, lightly dampening the affected plain fabric with clean water can be a reasonable first trial. Test an inconspicuous area, avoid soaking decorations, and follow the permitted drying method. The aim is to reset the fold, not stretch the panel until it looks flat.
For a shirt already due for washing, it is usually more efficient to wash it correctly and manage the drying stage than to press it first. Remove it promptly at the end of the cycle, separate bunched sleeves, and arrange the collar while it is still easy to position. Our fishing-shirt drying guide covers the broader drying decision; here, the useful wrinkle-prevention habit is avoiding a compressed pile after the machine stops.
When the wrinkle is actually a construction detail
A back vent may contain a pleat or overlapping flap that is supposed to project from the body. A shoulder seam may sit slightly forward. Do not iron these features into a new position just because they look uneven on a hanger. Compare the two sides and, when available, the garment photos. Smooth around the intended construction. Pressing a vent shut can produce an awkward crease that is more noticeable than the original rumpling.
Choose a permitted finishing method
| Label and condition | Reasonable next move | What to avoid |
|---|---|---|
| No ironing allowed | Reshape after a permitted wash and dry | Using a steamer as an assumed loophole |
| Low ironing permitted | Test a hidden plain area at the allowed setting | Increasing heat because the first pass looks modest |
| Tumble drying allowed | Use the specified setting and remove promptly | Adding high heat to speed the process |
| Graphics or bonded details | Keep direct heat away unless explicitly permitted | Pressing through a logo without checking its instructions |
If you are comparing care demands before buying, the Bonehead short-sleeve listing on Amazon is a useful woven-shirt example to examine. Check the selected item's label information rather than assuming every fishing shirt has the same finishing routine. The examples in this article illustrate different garment forms; they are not a wrinkle-resistance ranking.
Press a woven shirt in small sections
Use a clean iron and a stable ironing surface. Empty the water reservoir or disable steam if the label requires dry ironing. Begin in an inconspicuous plain section, then inspect the fabric under good light before continuing. A clean press cloth can help prevent direct contact, but it does not make an excessive temperature safe. Keep the setting within the garment's allowance even when using a cloth.
Work around buttons, zippers, hook-and-loop tabs, and logos. Lay one panel flat without another seam trapped underneath it. Lift and reposition the iron rather than repeatedly dragging a stretched panel. On a sleeve, choose whether you want a crease before flattening both layers together. If you prefer a soft sleeve, reposition it so the fold moves instead of pressing a hard line down its length.
Do not insist that thick seams become as flat as the shirt body. Pocket edges and collar layers can need different handling, and repeated pressure may leave impressions in the surrounding fabric. Finish the visible plain panels first, hang the shirt, and assess it at normal wearing distance. Often the remaining small irregularities disappear visually once the shirt is on a body.
Treat a performance knit as a flexible garment
A crew shirt does not need a sharply pressed placket or formal sleeve crease. The Huk Icon X long-sleeve crew illustrates that simpler form. For a knit, prioritize removing broad storage folds while preserving the original shape. Do not pull the cuffs, neck opening, or hem under the iron to create tension. If a permitted gentle finishing method does not help, leave it alone and ask the manufacturer before escalating.
Separate old folds from fresh heat damage
A wrinkle follows a fold; heat damage may instead show as a shiny area, flattened texture, or a change in color. If a mark appeared immediately after pressing, stop rather than passing the iron over it again. Let the shirt cool, inspect it without stretching, and compare the surface with an untouched section. More heat is not a sensible diagnostic tool.
A crease that returns at the same place after every wash may also reflect how the garment is loaded or dried. Check whether a sleeve is trapped inside the body, the front is folded beneath a pocket, or the shirt is left under heavier laundry. Changing that handling point can be more useful than scheduling a pressing session after every trip.
Hotel-room options that do not create a second problem
Unpack the fishing shirt when you arrive, even if the rest of your bag stays closed. Use the best-fitting hanger available, and keep the shirt clear of a wet bathroom counter or rough door hook. If the room has an iron, inspect its soleplate and test it on a separate clean cloth before bringing it near the shirt. An unfamiliar appliance is another reason to start conservatively.
A hot shower is often suggested as a universal wrinkle remover, but room steam is uncontrolled and may simply leave the shirt damp. Never place it where shower spray can soak it, and do not use a hair dryer, kettle, or radiator as an improvised fabric treatment. For a same-evening dinner, it can be more practical to smooth the collar and front, wear the shirt, and address stubborn folds properly at home.
Wrinkle-release sprays also deserve a compatibility check. Read both the spray label and garment instructions, test away from the visible front, and consider whether a fragrance or residue is wanted on a shirt worn next to skin. A spray sold for general clothing is not evidence that it suits every finish, print, or sun-protective fabric. Plain water is a simpler first trial when wetting is allowed.
Pack to reduce hard folds
Make sure the shirt is fully dry before packing. Fasten a few buttons, lay sleeves in natural positions, and smooth pockets before folding. Avoid trapping a bulky accessory under the front panel. Put a woven shirt near the top of the bag or in a compartment where shoes and tackle will not press hard corners into it. Keep clean shirts separate from wet fishing gear.
Rolling can suit a simple knit, while a loose fold may suit a structured button-front better. Neither method guarantees a wrinkle-free result. The important variables are compression, moisture, and whether fabric has been caught in a sharp fold. Leave a little room instead of forcing one more garment into an already tight cube. Our button-front collection can help you compare forms, but packing habits matter even with a familiar shirt.
For a replacement or second travel shirt, compare the shape and care information in the Icon X crew listing on Amazon with the woven shirts you already own. Do not buy solely on an assumption that performance means iron-safe or permanently wrinkle-free. Broader laundering questions belong in the fishing-shirt care hub; for wrinkles, the winning routine is the least aggressive permitted method that produces an acceptable appearance.
Frequently asked questions
Can I steam a fishing shirt that says do not iron?
Do not assume steaming is permitted. Check the exact garment instructions or ask the manufacturer; use no-heat reshaping while that remains unclear.
Should I iron the back vent flat?
Preserve its intended pleat or overlap. Smooth the surrounding panel and compare garment photos before changing a vent fold.
Is rolling always better than folding for travel?
No. A simple knit may roll neatly, while a structured button-front may suit loose folding. Avoid packing either damp or under heavy compression.
Final Verdict
Use the garment label to choose your ceiling for heat, then begin below that ceiling with hanging, smoothing, and careful drying. A button-front may benefit from selective pressing when permitted; a performance crew often only needs broad folds relaxed. Travel wrinkles are easier to prevent when the shirt is packed dry and unpacked early. If a crease survives the allowed method, accept it or seek manufacturer advice instead of raising the temperature. The goal is a wearable, presentable shirt with its shape and details intact, not a dress-shirt finish at any cost.
Explore the matching collections
Take the next step
Compare your shortlist or explore more care & durability.
Revisit the first shirt on Amazon ↗Related field notes
Should You Use Fabric Softener on Fishing Shirts?
Learn when to skip fabric softener on fishing shirts, how to interpret care instructions, and what to check after an accidental softener wash at home.
Read the field note →How to Remove Fish Blood Stains from Fishing Shirts
Remove fish blood from fishing shirts with cold-water first steps, fabric-safe pretreatment, and a check-before-drying routine for fresh or dried stains.
Read the field note →Do Fishing Shirts Shrink?
Do fishing shirts shrink? Learn how to check a fit change, compare garment measurements, read care limits, and avoid using heat to resize shirts.
Read the field note →Packing Fishing Shirts for a Multi-Day Trip
Work out how many fishing shirts to pack using outing days, laundry access, rewear preferences, drying uncertainty, and a compact clean-and-worn system.
Read the field note →