How to Deal with Snags in Fishing Shirts
Assess fishing-shirt snags before cutting or sewing: distinguish pulled loops, woven puckers, seam damage, and holes, then choose a careful repair path.
Quick Answer
Do not cut a protruding snag before identifying it. Take the shirt off, inspect both sides, and distinguish an intact pulled loop from broken yarn, a hole, or a loose seam. A small intact loop may be moved carefully to the inside with a suitable repair tool; a run or tear needs a different repair. Stop if the fabric distorts, and do not assume a cosmetic fix restores the original UPF rating.
As an Amazon Associate I earn from qualifying purchases. These links take you to Amazon, where purchases take place.
Three relevant shirts to compare
Examples for this guide. Check the exact garment and variation on Amazon.


In this field note
- Start with four observations
- Identify knit, woven, and seam damage
- For an intact small loop, keep the intervention small
- A woven pucker needs patience, not a hard pull
- Holes, runs, and seam failures deserve a different plan
- Inspect performance claims separately from appearance
- Remove the snag source before wearing it again
The fastest way to make a small snag worse is to treat every loose thread as something to trim. The thread may be an intact part of the fabric, a broken seam, or the beginning of a run. Those cases look similar at a glance but need different decisions. Before using scissors, put the shirt on a clean surface and spend a moment identifying the damage.
Start with four observations
- Is the projecting thread still a continuous loop, or does it have a broken end?
- Is there a hole, a thin open line, or only a raised thread?
- Does the damage sit in the fabric body, a mesh panel, or a stitched seam?
- Does gentle handling change the shape of the surrounding area?
Use good light and inspect the inside as well as the outside. Take a close photo before doing anything, then a wider photo showing where the damage sits. This helps if you contact the manufacturer or a repairer, and it gives you a reference for whether your attempt is improving the surface or extending the distortion. Do not repeatedly pull the snag to make it easier to photograph.
If the shirt is still caught on a hook or rough fitting, free it carefully without yanking. Remove the garment before any work with needles or cutting tools. Keep hooks and tackle out of the repair area so the fabric does not catch again while you concentrate on the first problem. A calm setup is more useful than trying to fix a sleeve while wearing it on a moving boat.
Identify knit, woven, and seam damage
A knit is formed from interlinked loops. A pulled loop may distort neighboring loops, while a broken one can leave a developing opening. A woven fabric has crossing yarns; a pulled yarn may create a pucker or a line extending away from the snag. These descriptions help you recognize the pattern, but fine fabrics can be hard to inspect without magnification. If you cannot see the structure clearly, avoid probing it with a needle.
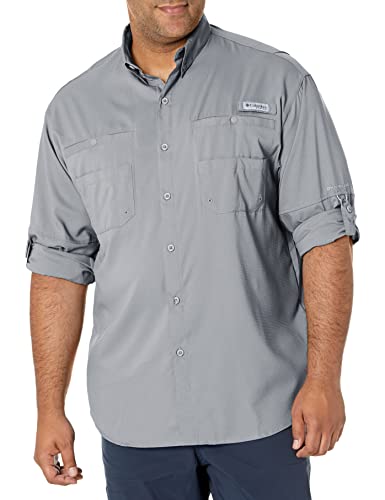
The Huk Icon X crew overview and Tamiami II button-front overview show different garment forms to compare. Do not assume that all crew shirts use the same knit or all button-fronts have identical fabric. Check the damaged panel itself; a shirt can combine more than one construction, especially around vents.
| Observed damage | Likely repair category | When to stop home work |
|---|---|---|
| Intact loop with no opening | Careful snag adjustment | The loop resists or the panel puckers more |
| Long line of pulled woven yarn | Gentle redistribution or specialist assessment | The line spreads or the yarn breaks |
| Open hole or ladder in knit | Structural mending | You cannot identify the remaining loops |
| Loose stitching at a seam | Seam repair | The seam bears load or continues opening |
| Several abraded thin areas | Condition assessment | Repair would cover widespread weakness |
For an intact small loop, keep the intervention small
Lay the shirt without tension. With clean hands, very gently ease the surrounding fabric toward its original shape. Work around the affected area rather than pulling on the protruding loop itself. If the distortion relaxes with light handling, pause and reassess. The goal is not to stretch the entire panel wider; it is to avoid leaving all the displaced yarn gathered into one visible point.
A suitably fine snag-repair tool may help move a remaining loop to the inside. Use only a tool intended for the fabric and follow its instructions. Test your handling on an inconspicuous area or spare similar fabric when possible. Guide the loop through near its own origin without making a new large hole or catching neighboring yarns. If the tool requires force, it is not an appropriate next step for that spot.
Once the loop is inside, inspect the outside and inside again. Moving it out of sight is a cosmetic adjustment; it does not mean the fabric has been rewoven. Do not tie a tight knot simply to make the inside look tidy. A knot can gather the surrounding fabric and create a pressure point against skin. If a loose interior loop still catches or concerns you, ask a repairer how to secure it without distorting the panel.
Why cutting is a poor first move
An intact snag contains yarn that still belongs to the fabric. Cutting it changes the problem into one with broken ends. That may make the outside look briefly neater while making later repair more difficult. Scissors are appropriate for some known excess seam-thread tails, but only after you establish that the stitch line is secure. When you cannot tell a seam tail from damaged fabric yarn, leave it attached.
For a performance-crew example, the Icon X listing on Amazon helps identify the garment before requesting repair advice. Send a photo of the actual snag and label; current Icon garments may differ from the Icon X edition. A product name is useful context, but the repair decision depends on the damage rather than the brand.
A woven pucker needs patience, not a hard pull
When a yarn is pulled along a woven panel, the visible effect may extend well beyond the point that caught. Work with the fabric lying flat and inspect the whole line. Lightly easing adjacent fabric can sometimes reduce the gather, but do not tug both ends of the panel as if stretching a rope. Stop if the line becomes sharper, the yarn breaks, or the opening enlarges.
A tiny remaining irregularity may be the best achievable home result. Do not press the pucker with a hot iron to force it flat. Heat permission is a separate care question, and flattening the surface does not replace displaced or broken yarn. If appearance matters, a textile repairer can assess whether a more precise repair is worthwhile before you make additional changes.
The Bonehead short-sleeve overview is another button-front example. Its current manufacturer page describes cotton poplin, whereas the current Tamiami II long-sleeve page describes polyester ripstop. Those current examples illustrate construction differences, not a guarantee about every older marketplace variant or a claim that one fabric cannot snag.
Holes, runs, and seam failures deserve a different plan
If you can see an opening, do not use the intact-loop approach as a complete repair. A hole may need stitching or a compatible patch; a run may require catching specific loops; a seam may need to be restitched along its original construction. The right choice depends on location, stretch, and how much sound fabric remains around the damage. A generic adhesive patch is not automatically suitable for every light fishing knit.
Check the garment maker's repair advice and any patch manufacturer's fabric and care compatibility. A patch that is stiff or rough can rub under a backpack or life jacket, even if it adheres successfully. A repair across a stretch zone can restrict movement. Consider how the repaired area will behave during casting, paddling, and ordinary washing, not just whether the hole disappears in a photograph.
Seam damage at an underarm, shoulder, or pocket corner deserves particular attention because those areas are repeatedly loaded in use. Avoid relying on a quick knot in one loose end. A repairer can decide how far the seam needs to be reinforced. If the garment is new or the damage appeared unusually early, document it and contact the relevant seller or manufacturer before changing it further.
Inspect performance claims separately from appearance
A repaired shirt can remain useful, but a visually tidy spot does not establish its original protection. ARPANSA's sun-protective clothing guidance explains that fabric construction and tension affect UV protection and that normal wear can matter. A home snag repair is not a UPF test, and a patch does not acquire the surrounding shirt's rating merely by being attached to it.
If the damaged area is visibly open, thin, or stretched, do not count on it as intact rated coverage. Consider another garment or appropriate additional coverage while seeking advice. This is especially relevant on shoulders, forearms, and the upper back, where a small repair can sit on an exposed part of the shirt. Avoid inventing an expiration date or a numerical reduction in rating.
Remove the snag source before wearing it again
Inspect the object that caused the pull: an open hook-and-loop tab, rough zipper edge, damaged chair arm, exposed hook, or abrasive pack strap. Run a separate cloth over a suspected rough surface instead of testing it with the repaired shirt. Close fasteners before laundering and separate delicate tops from items likely to catch them. Columbia's general care advice specifically recommends closing fasteners to reduce snagging.
Check pockets for forgotten hooks or sharp accessories before washing. Store shirts away from tackle, and keep them out of a bag compartment containing loose hardware. If snags appear repeatedly in the same place, examine fit and equipment contact before buying a replacement. A new shirt can develop the same damage if it rubs the same rough fitting every trip.
Review the Tamiami II listing on Amazon only if you need to identify or replace that garment form, and compare button-front options for construction and fit rather than an unsupported snagproof promise. The care hub covers washing and storage after repair. A successful outcome can be a modest cosmetic improvement and continued sensible use; it does not have to mean making the shirt indistinguishable from new.
Frequently asked questions
Should I cut a loop sticking out of my fishing shirt?
Not before identifying it. An intact pulled loop is part of the fabric, and cutting it creates broken ends that may complicate repair.
Can a snag tool fix a hole?
Moving an intact loop to the inside is different from repairing missing or broken structure. A hole, run, or failing seam may need stitching, a compatible patch, or professional work.
Does repairing a snag restore the shirt’s UPF?
A cosmetic repair does not verify UPF. Do not assume a visibly thinned, open, or patched area has the original fabric’s rating.
Final Verdict
Begin with diagnosis and preserve the yarn you still have. A small intact snag may respond to gentle adjustment or a suitable repair tool, while an opening, run, or loose seam needs structural attention. Stop when the fabric resists, puckers more, or starts to open; further experimentation can cost more than accepting a minor imperfection. Inspect equipment and laundry companions so the repaired shirt does not catch again. Finally, judge appearance and protective performance separately. A cleaner-looking surface can make a shirt pleasant to wear without proving that a damaged area has regained its original rating.
Explore the matching collections
Take the next step
Compare your shortlist or explore more care & durability.
Revisit the first shirt on Amazon ↗Related field notes
Button-Up vs Performance Fishing Shirts: Woven or Knit?
Compare button-front and knit fishing shirts by closures, pockets, movement and layering, while understanding why both can carry performance features.
Read the field note →How to Get Wrinkles Out of Fishing Shirts
Get wrinkles out of fishing shirts with label-safe drying, careful pressing, and travel packing tips for woven shirts, performance knits, and logos.
Read the field note →Should You Use Fabric Softener on Fishing Shirts?
Learn when to skip fabric softener on fishing shirts, how to interpret care instructions, and what to check after an accidental softener wash at home.
Read the field note →Can You Put Fishing Shirts in the Dryer?
Can fishing shirts go in the dryer? Follow a practical drying decision guide for care labels, damp hoods, prints, travel, and unfinished stains.
Read the field note →